TALOS - Tactical Awareness & Land Operating System


TALOS is the mapping and Battlespace Management System (BMS) suite of the GVA product line. It combines a local map tile server with a full-featured tactical display, delivering situational awareness to GVA crew stations both online and in fully disconnected environments.
The Problem
Tactical mapping in armoured vehicles is constrained by two realities: connectivity is intermittent at best, and commercial map services cannot be used in classified environments. Crews need satellite imagery, military symbology, live AIS/ADS-B feeds, and weather overlays fused onto a single display — yet most BMS solutions require persistent cloud access or expensive proprietary map data that cannot be cached legally for offline use.
How TALOS Solves It
TALOS ships a local tile server (gva-tile-server) that pre-downloads map tiles from 50+ open data sources before a mission, then serves them over localhost with zero internet dependency. The BMS application (gva-app-bms) renders those tiles alongside real-time connectors for AIS vessels, ADS-B aircraft, NMEA GPS, Cursor-on-Target (CoT), and weather radar — all with MIL-STD-2525D / APP-6D military symbology. It runs as a GVA third-party extension inside the ATLAS HMI or as a standalone full-screen tactical display.
Overview
The TALOS suite provides:
- Offline-first map tiles — Pre-sync satellite, topographic, terrain, street, and nautical charts for disconnected operations
- Military symbology — Full MIL-STD-2525D symbol rendering with APP-6D icons and SIDC-based point dropper
- Live data connectors — AIS vessel tracking, ADS-B aircraft tracking, NMEA GPS, and Cursor-on-Target (CoT)
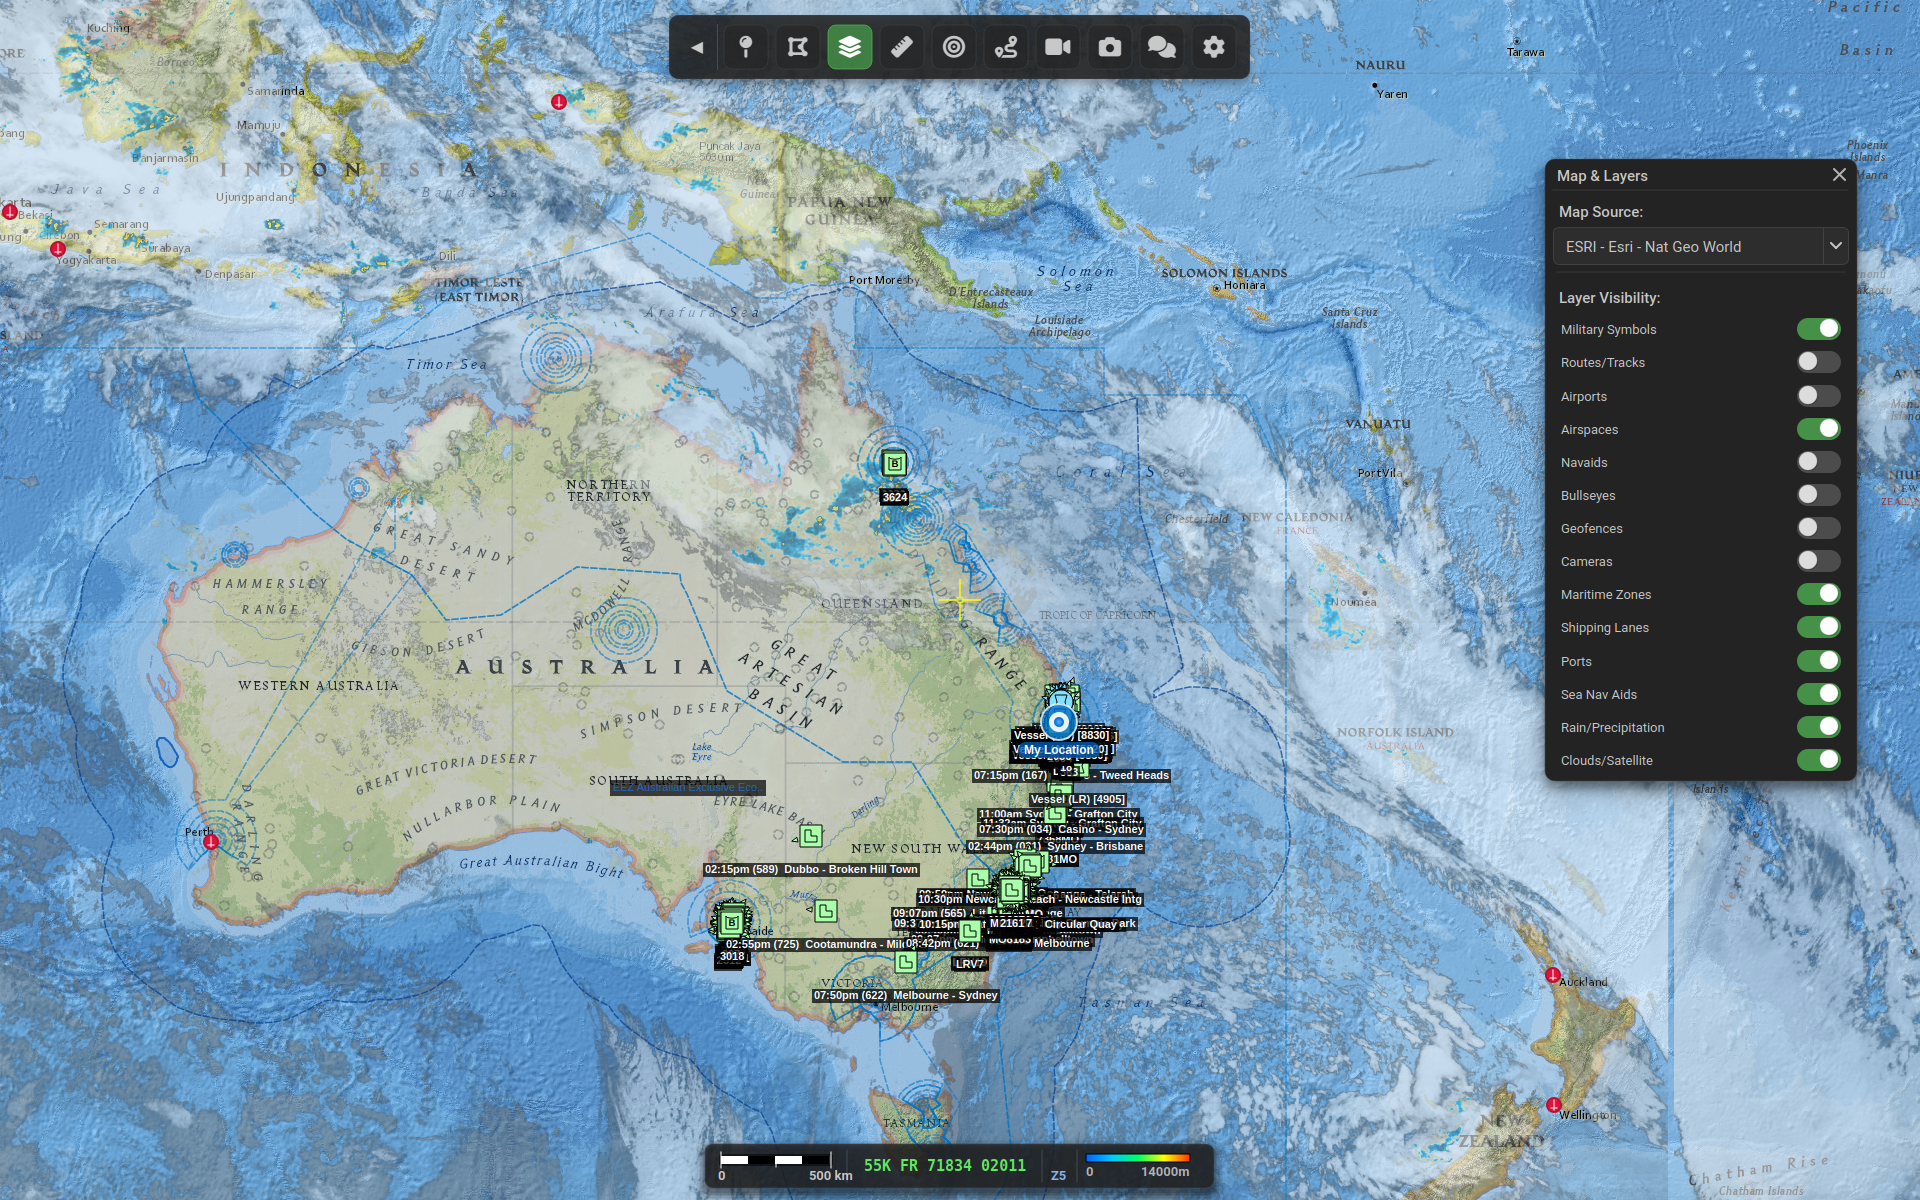
- Weather overlays — Real-time rain radar and cloud/satellite imagery from RainViewer
- Layer management — Toggle airports, airspaces, navaids, maritime zones, routes, and tactical symbols
- Symbol interaction — Radial context menu for edit, delete, annotate, and move operations
- GVA HMI integration — Renders as a third-party session inside the ATLAS display with full bezel button support
- Standalone mode — Floating toolbars, draggable panels, and data-source toggles for independent use
Offline Operation
The BMS integrates with the Tile Server for fully offline map
display. When the tile server is running, the BMS can switch to Local - * map sources
which fetch tiles from http://localhost:8070 instead of remote servers.
Pre-mission workflow:
- Sync tiles for the area of operations using the tile server CLI
- Start the tile server systemd service
- Launch the BMS — select any
Local - *source for offline maps
Local tile sources use the noCache flag to avoid double-caching since tiles are already
stored in the tile server's shared cache at /var/cache/gva-maptiles.
See the Tile Server documentation for full details on syncing tiles, licensing, and deployment.
Standalone Mode
The BMS supports a standalone mode (--standalone) with enhanced features:
- Floating toolbar - Drawing tools, point dropper, map layer selector, data sources
- Popup panels - Draggable, semi-transparent panels for settings and options
- Position memory - Panels remember their last position when reopened
- Live data toggles - Enable/disable individual data connectors
Running Standalone
Screenshots
Map Layers
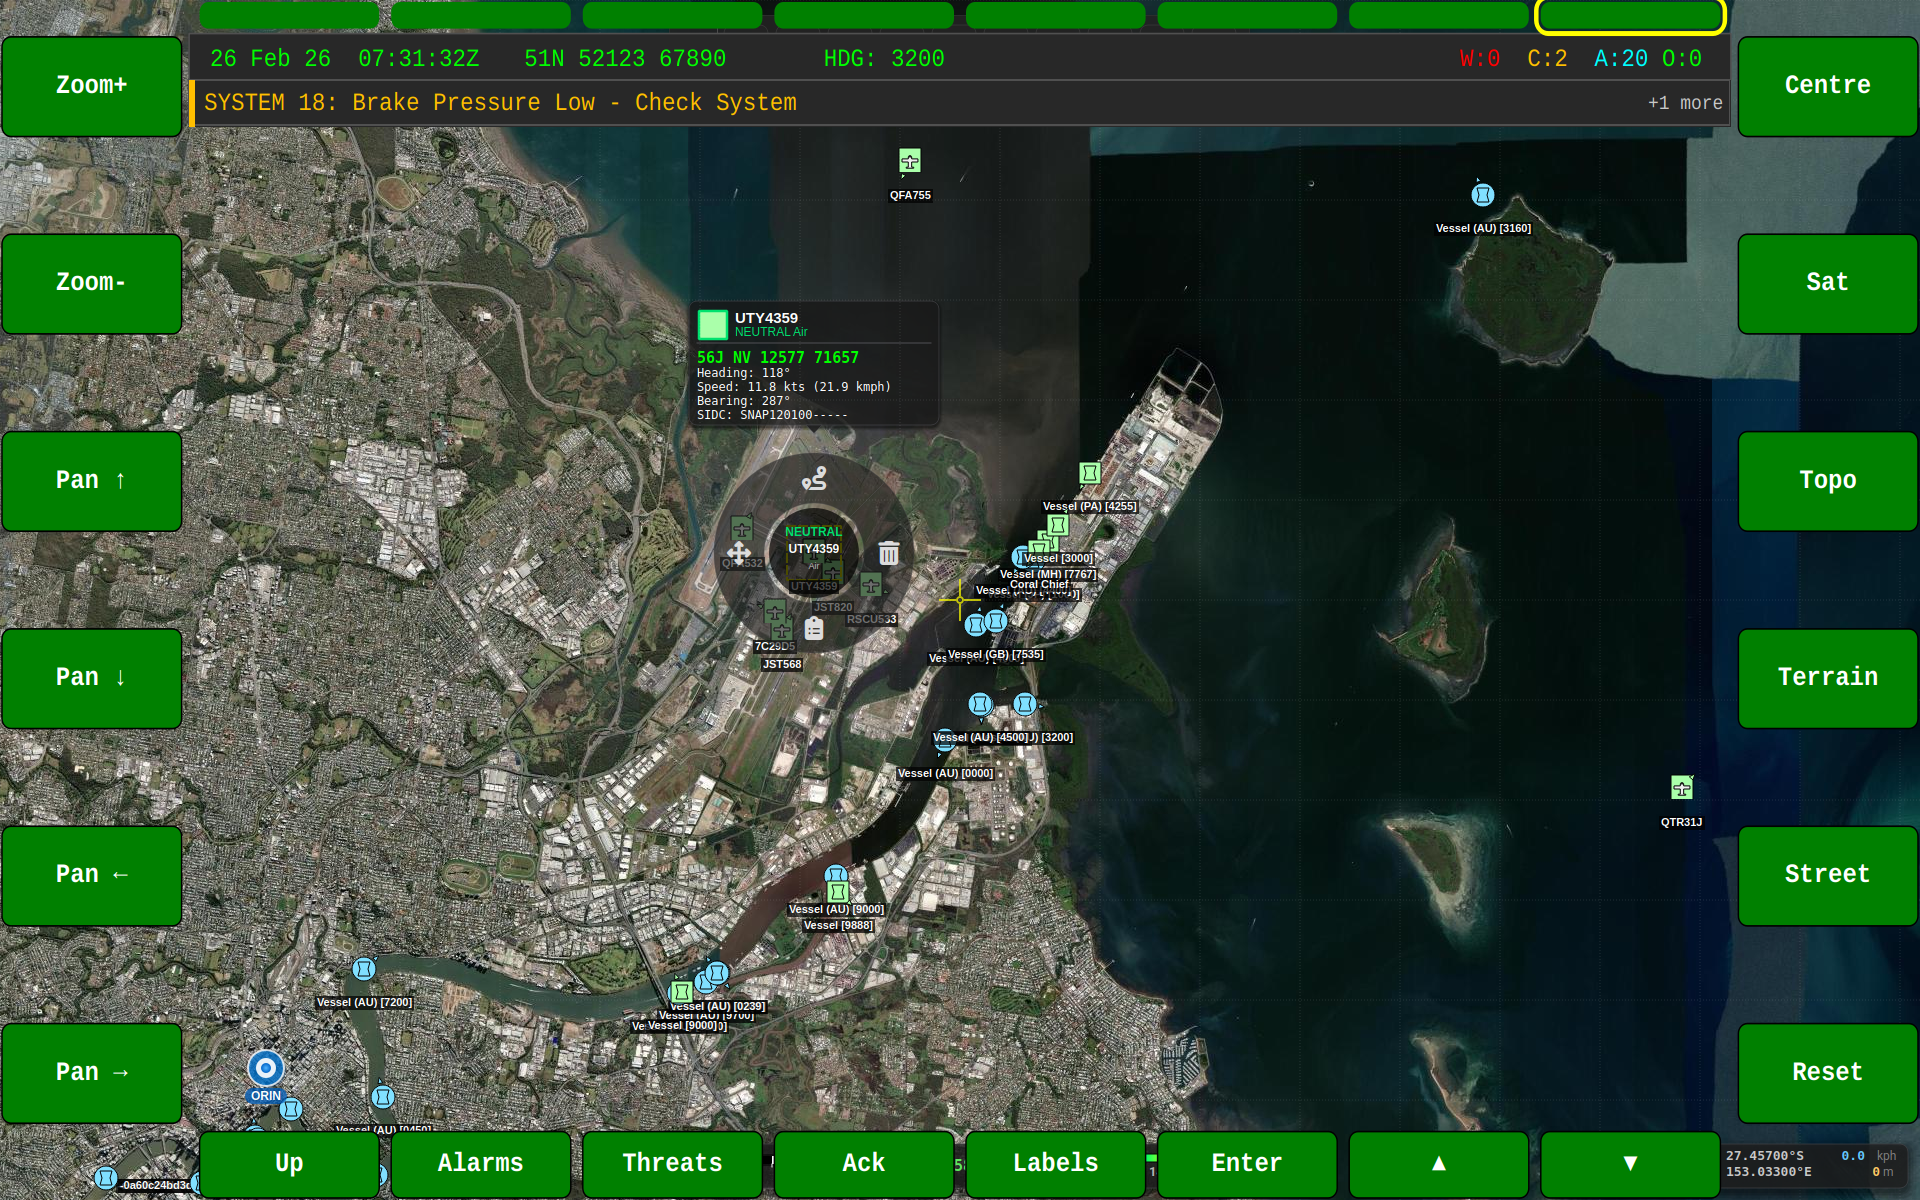
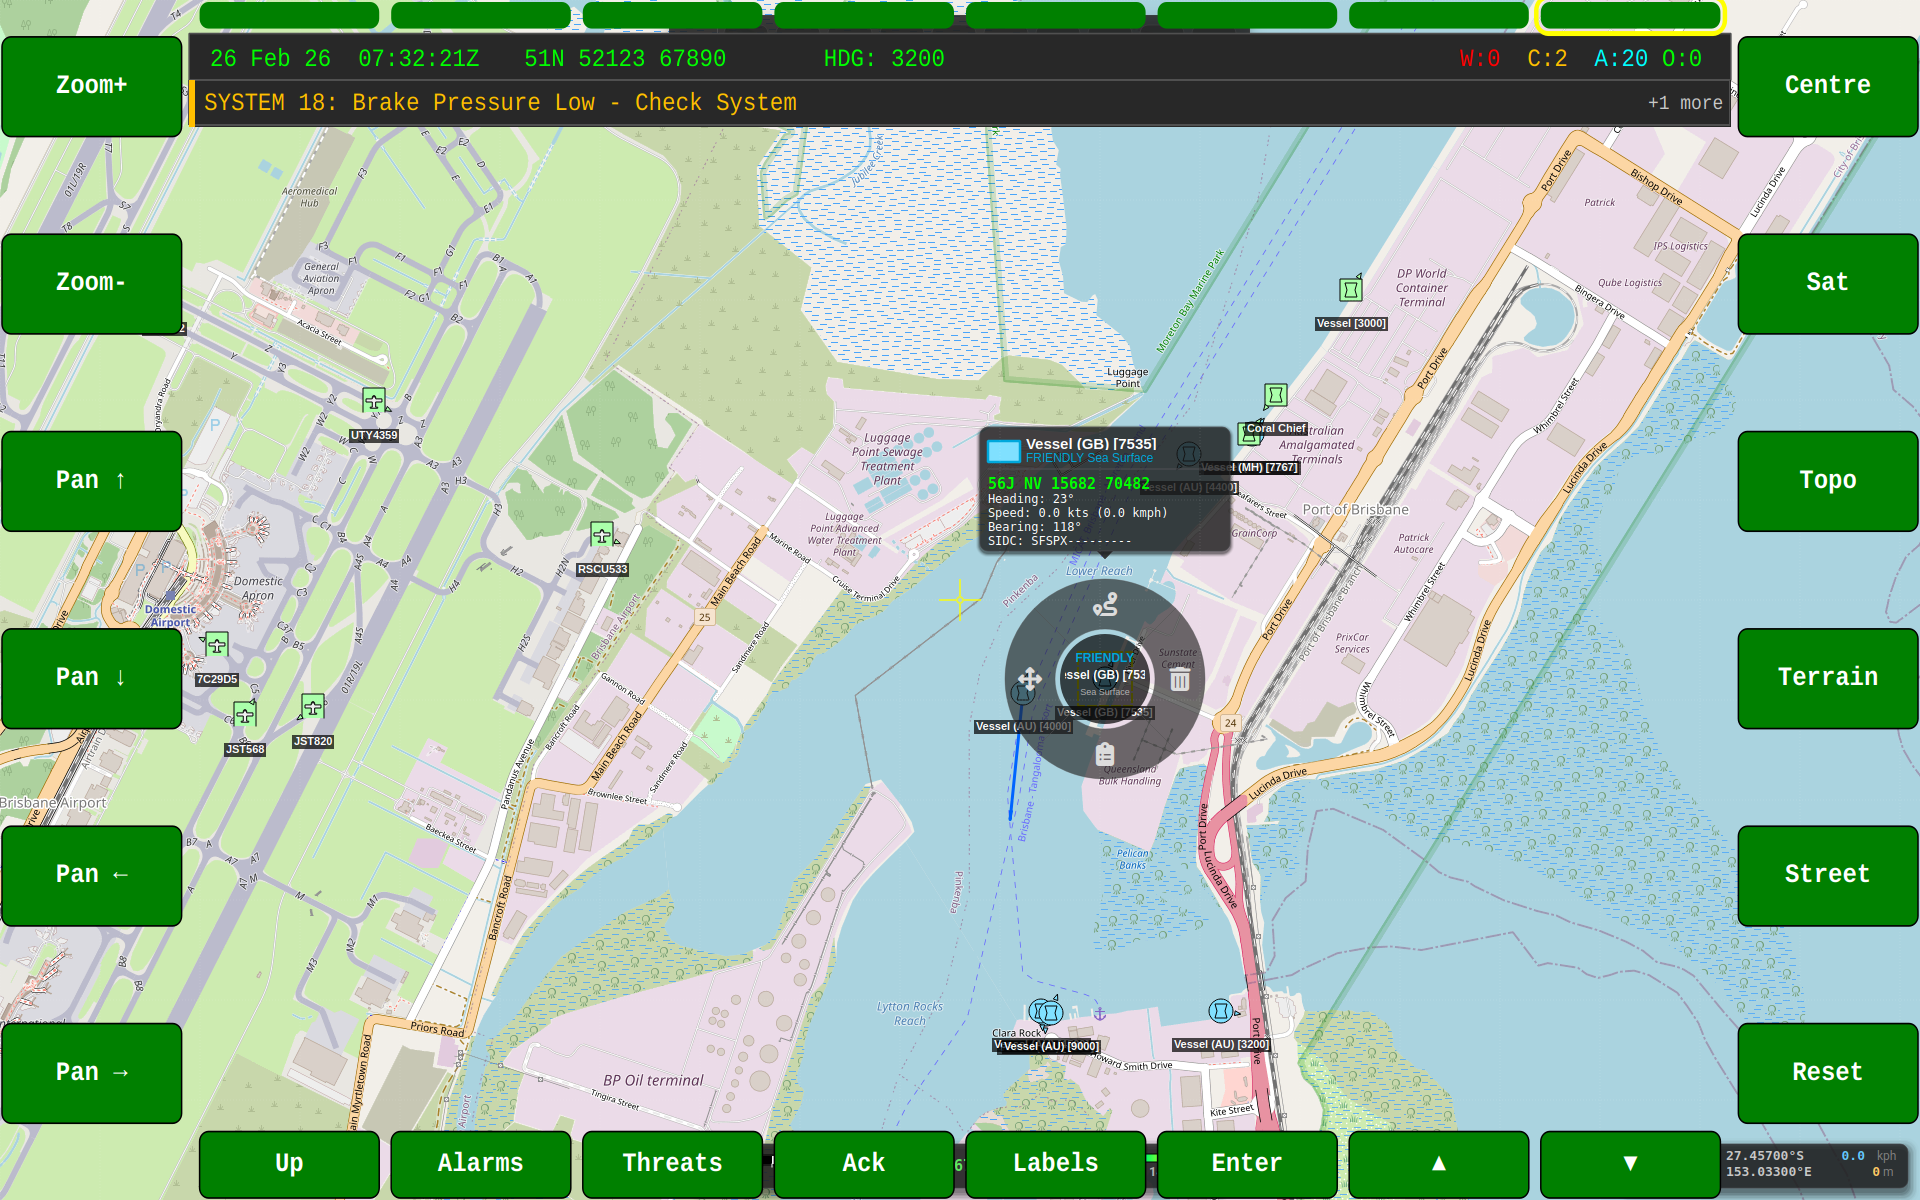
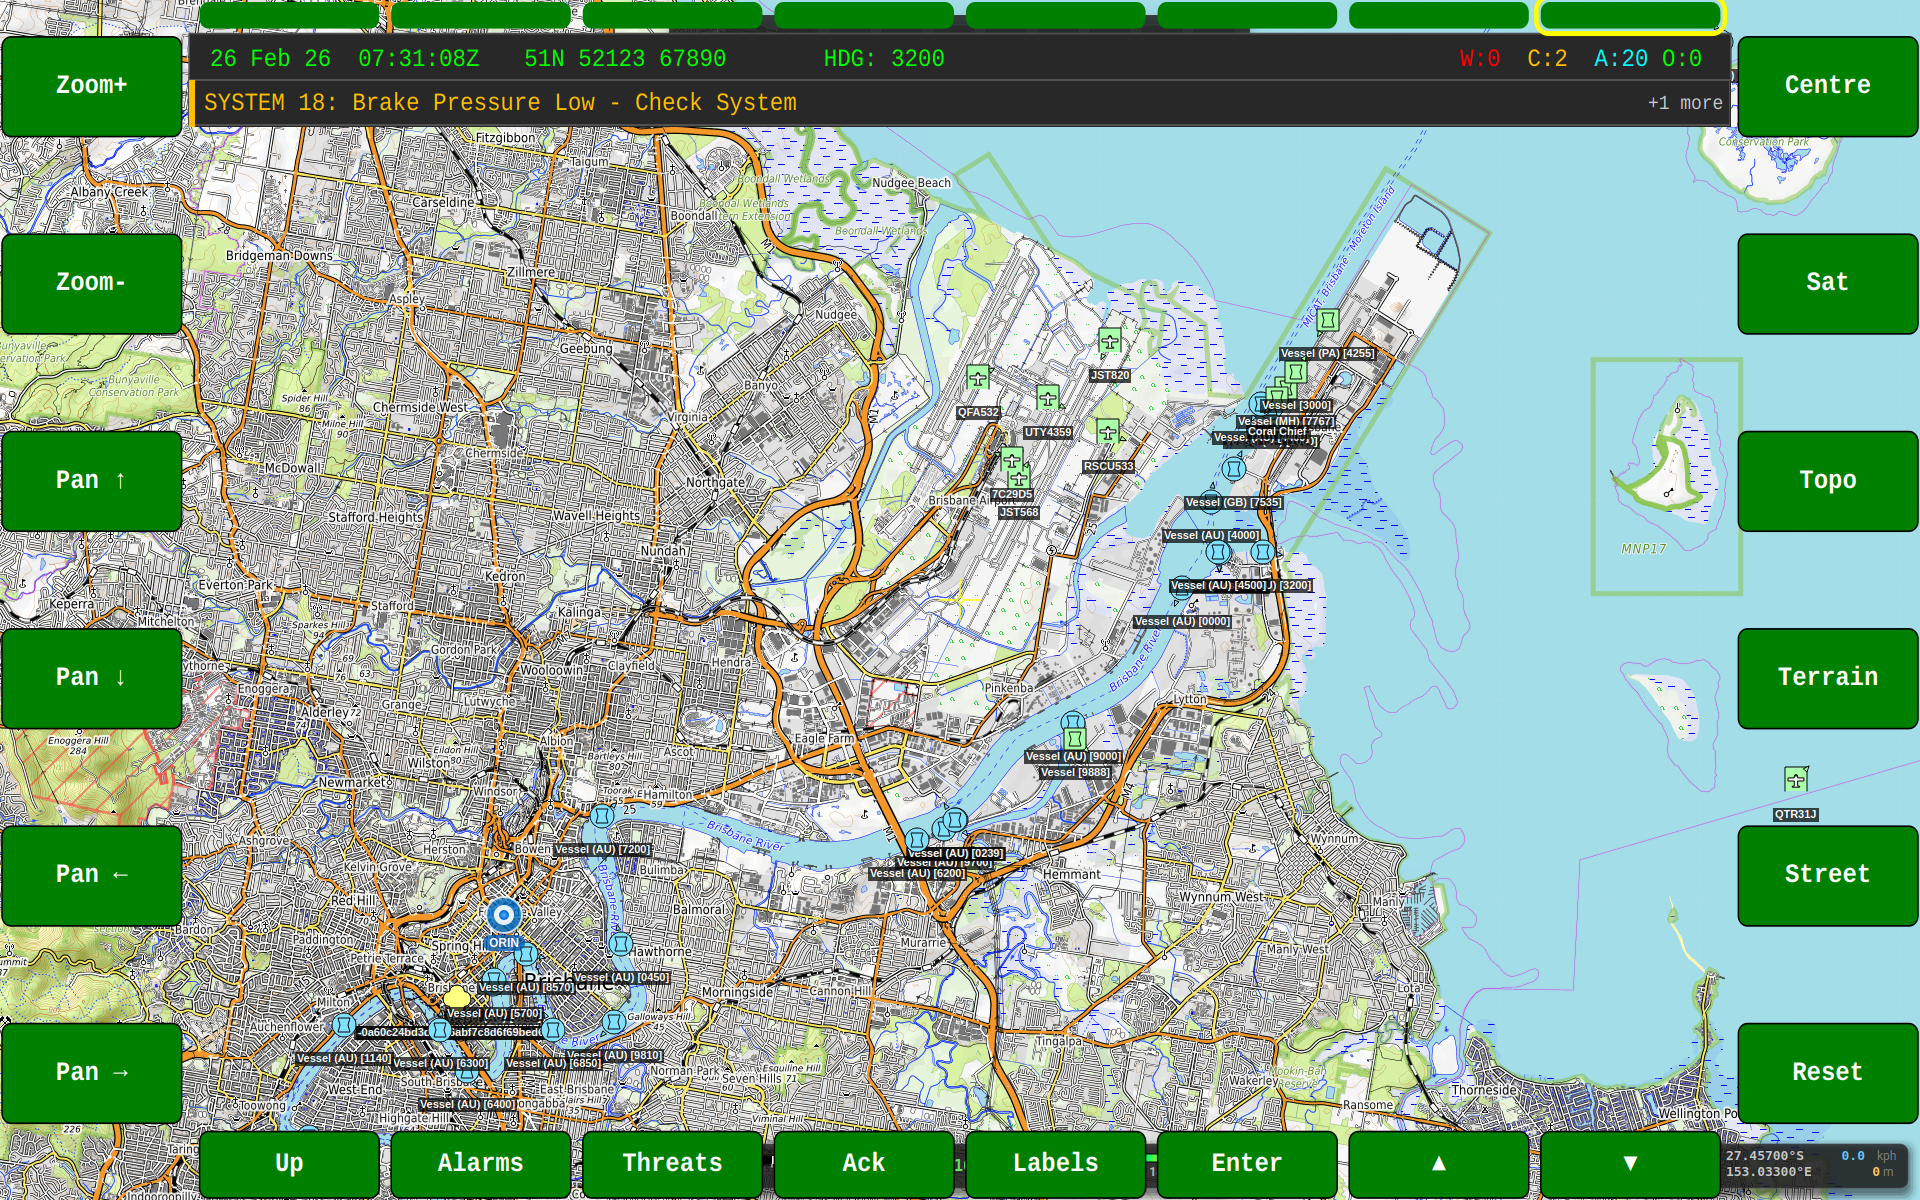
The BMS supports multiple map tile providers:
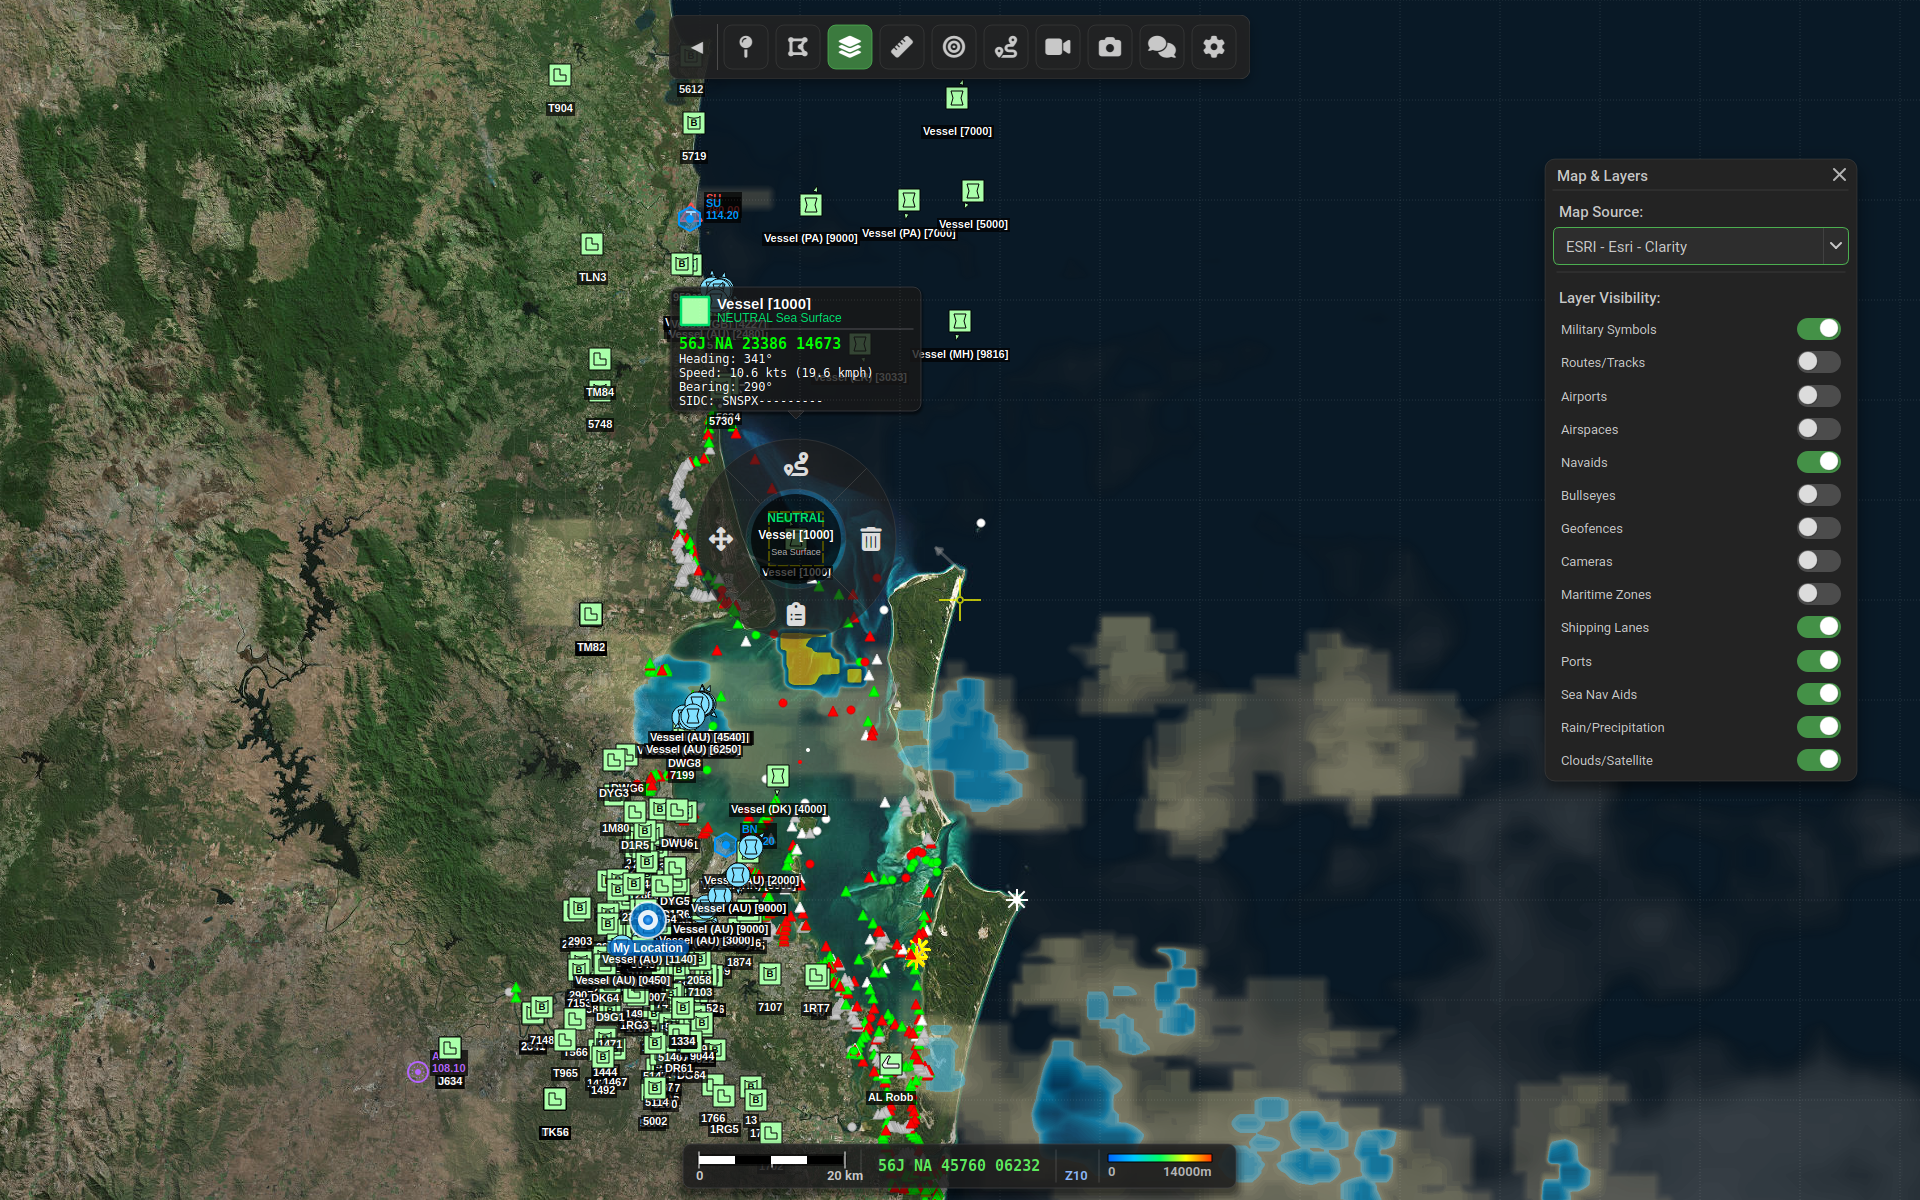
Satellite
ESRI World Imagery satellite view.
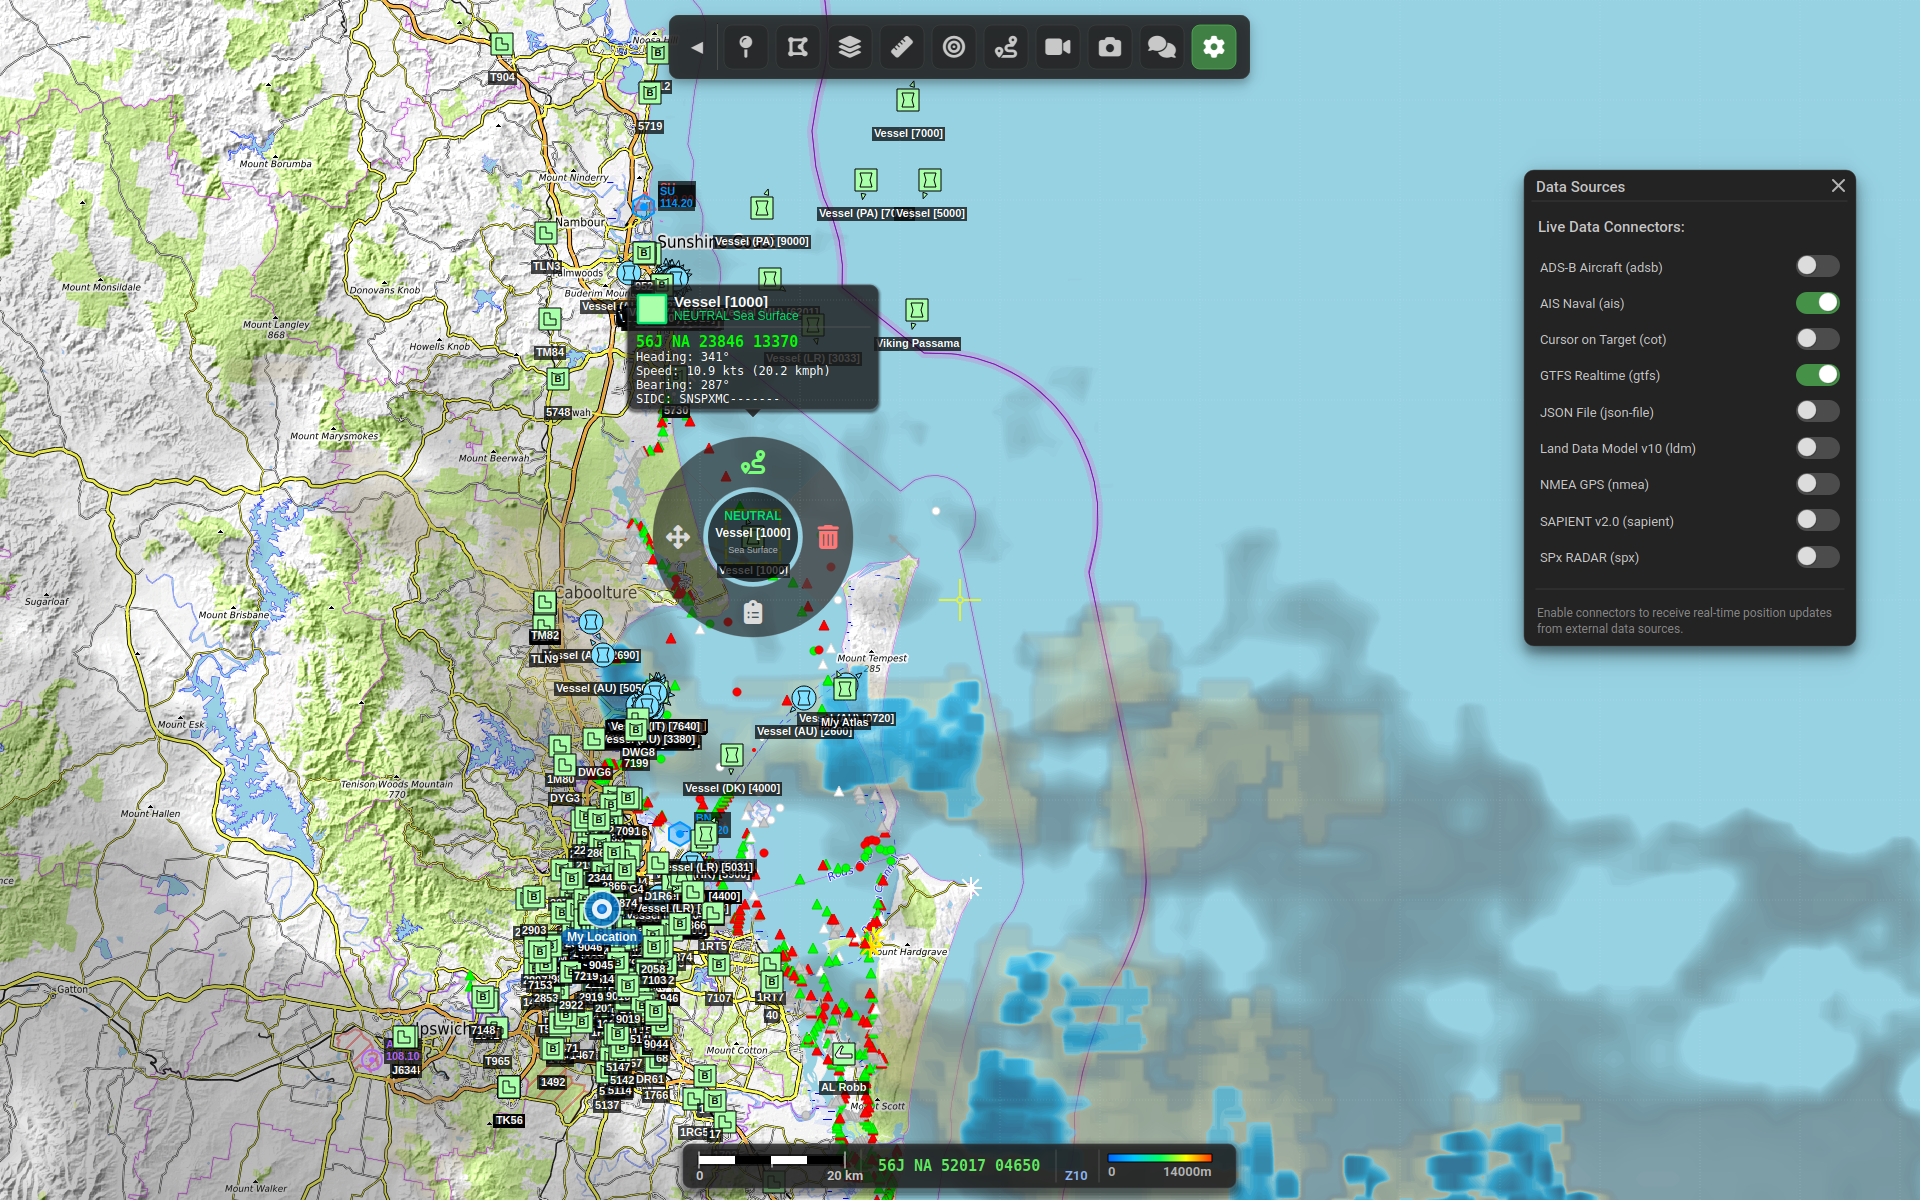
Topographic
ESRI World Topographic map with elevation contours.
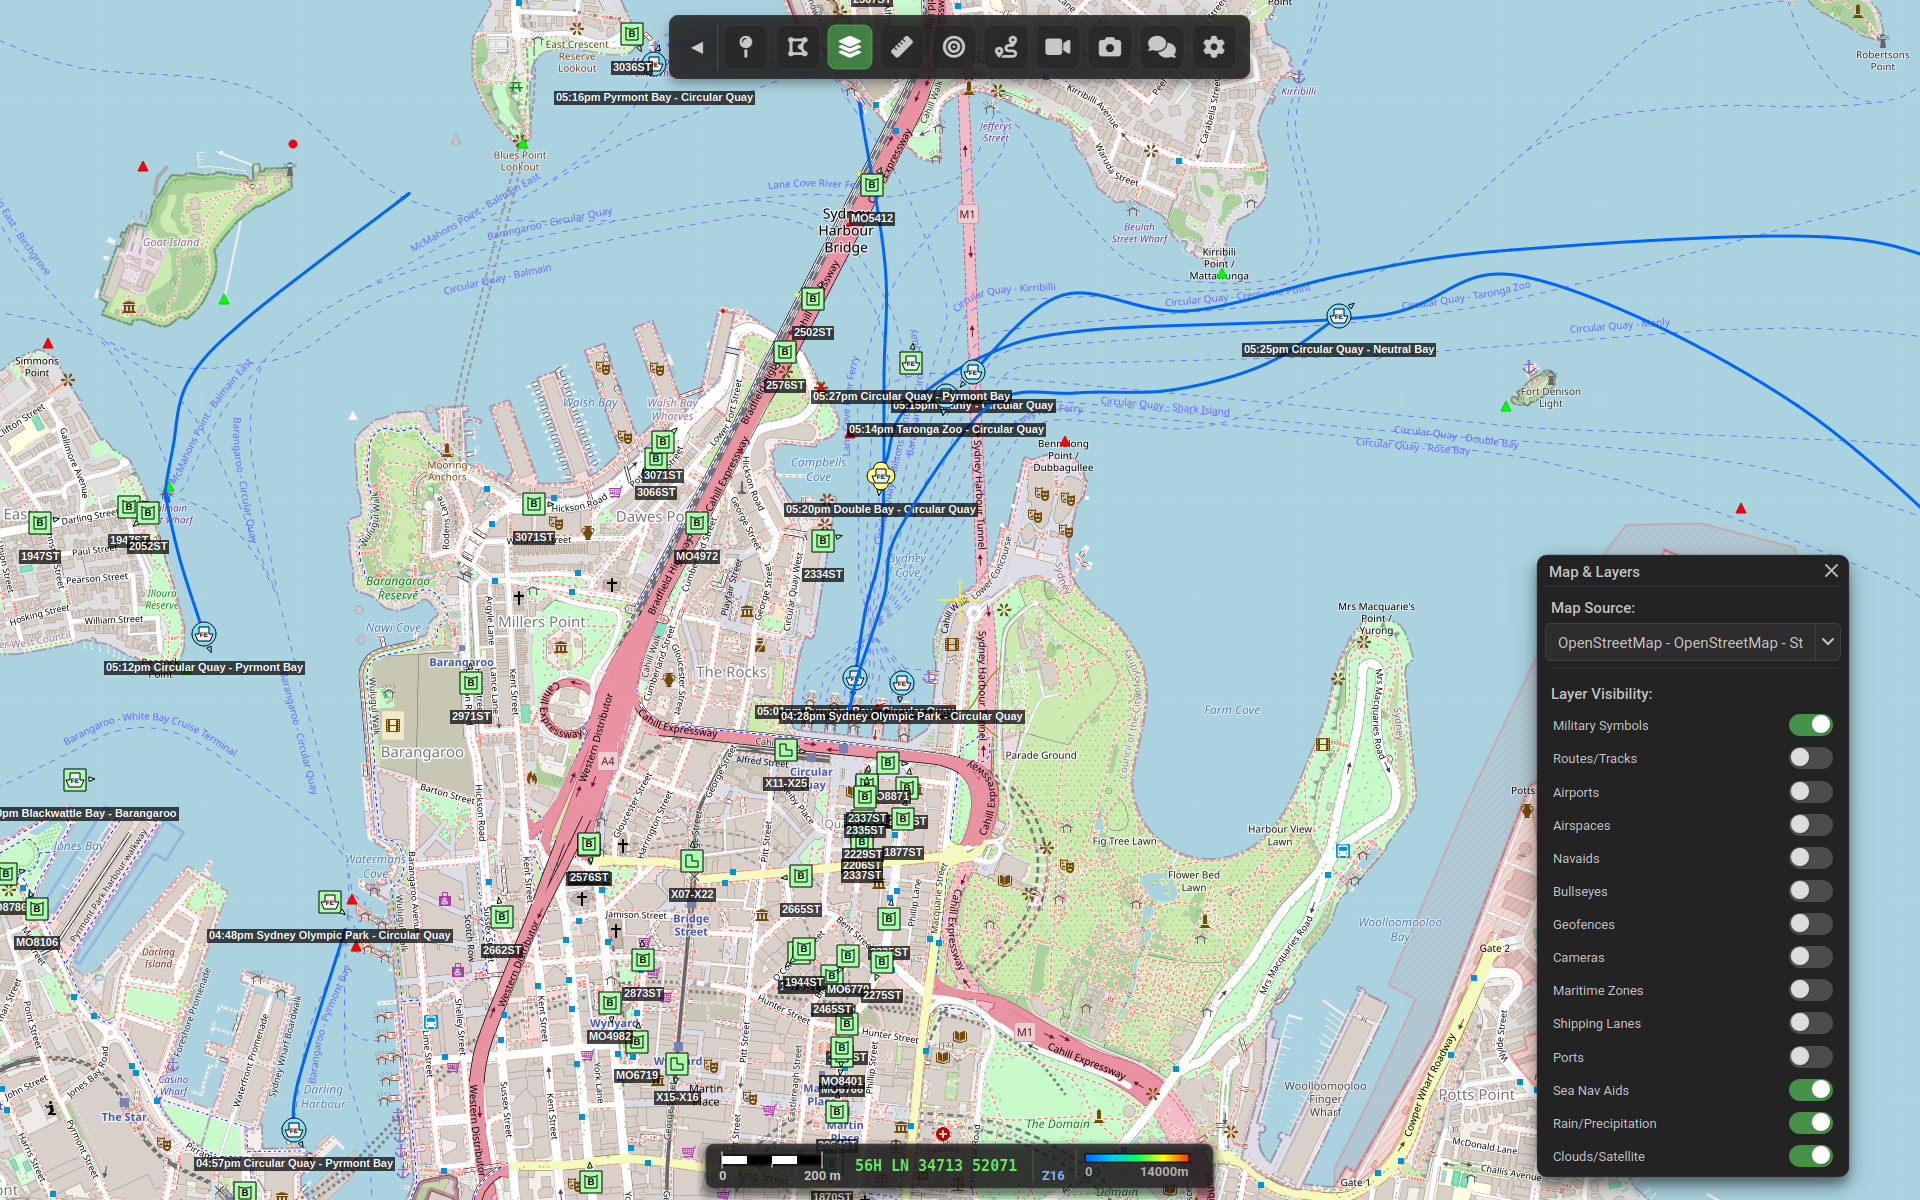
Street
OpenStreetMap street map view.
HMI Integration Views
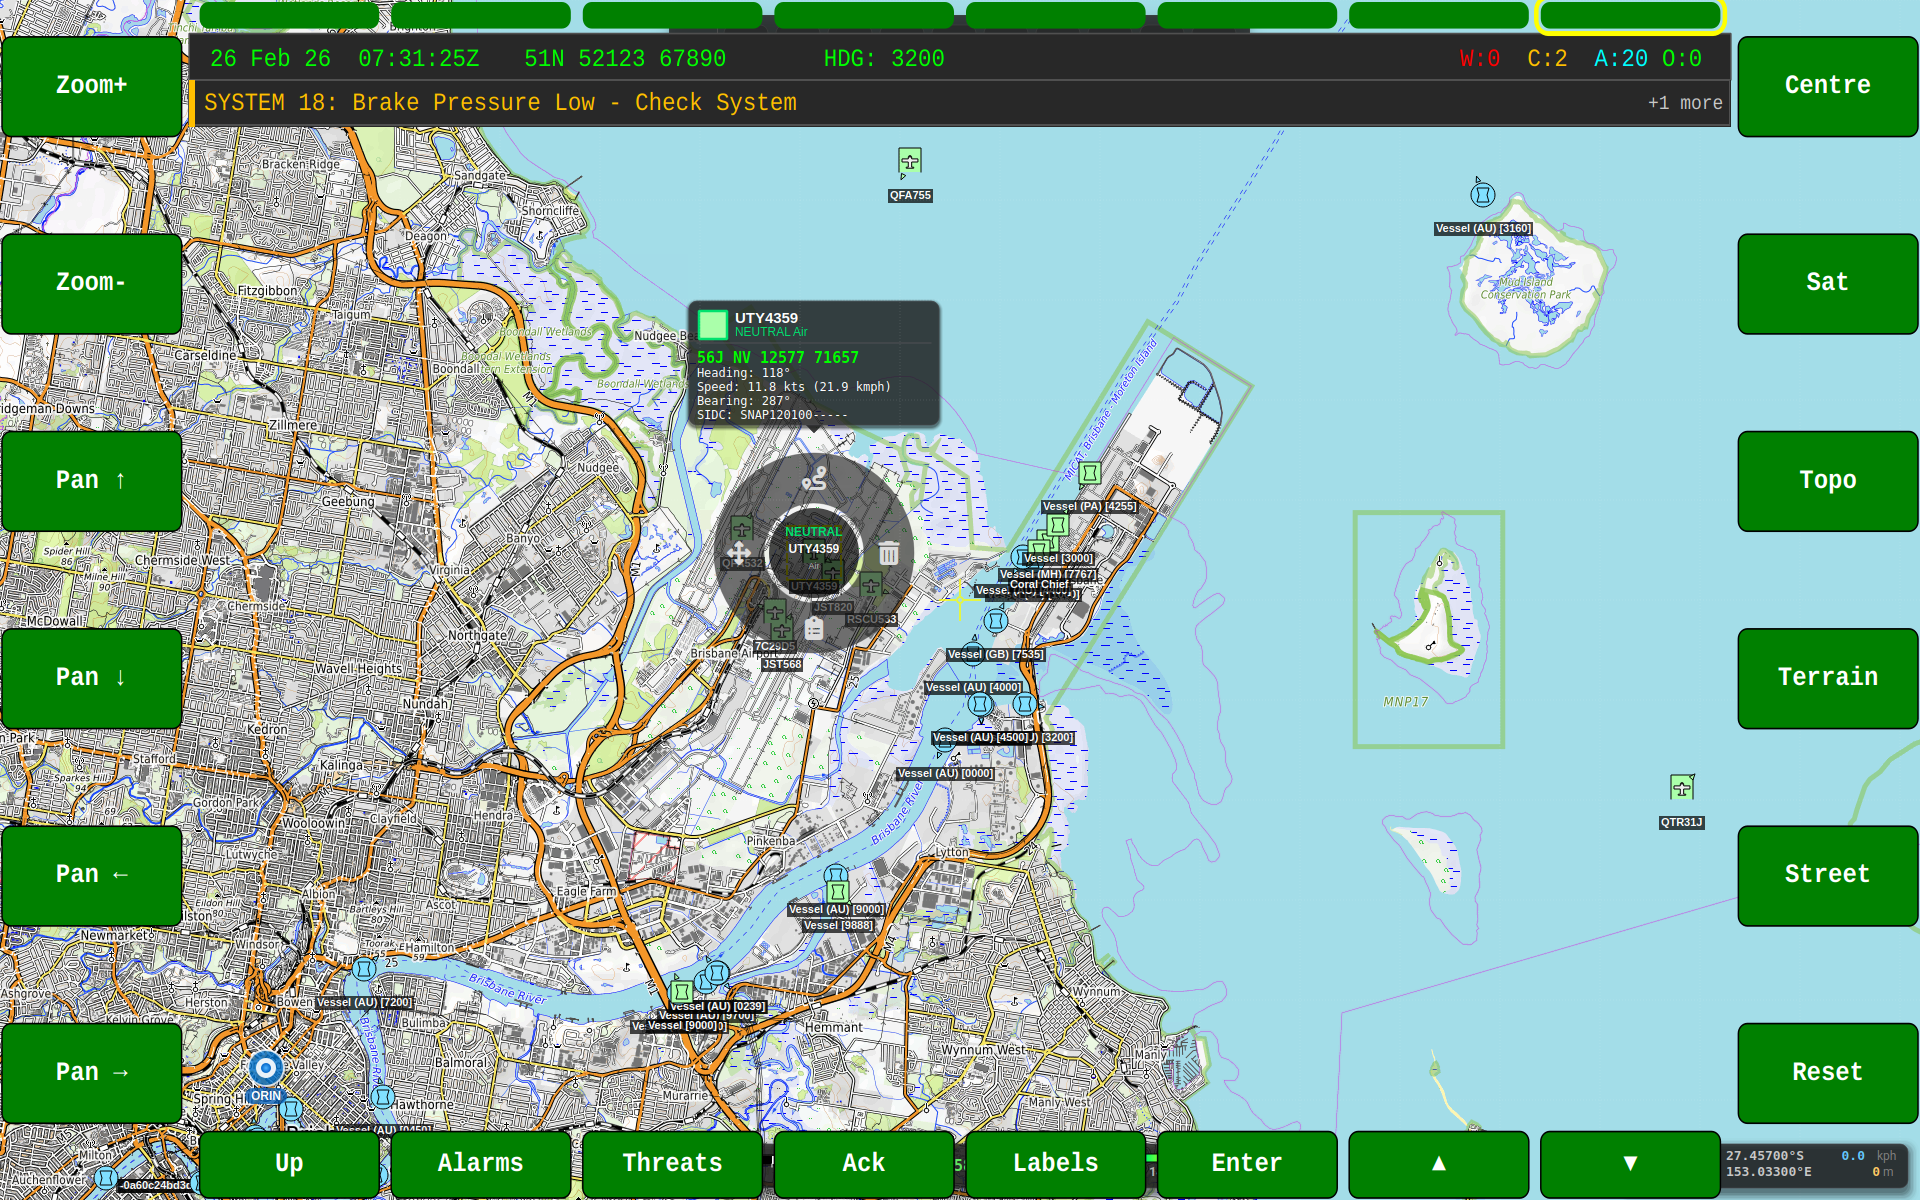
When running within the GVA HMI, the BMS renders to the BMS functional area screen:
Map View
Satellite View
Topographic View
Map Application
Weather Overlay
Real-time weather radar overlay showing precipitation.
Symbol Interaction
The BMS provides a radial menu for interacting with military symbols on the map.
The radial menu provides options to:
- Delete - Remove the symbol from the map
- Note - Add or edit a text annotation
- Waypoint - Set a navigation waypoint
- Move - Reposition the symbol
Symbol Notes
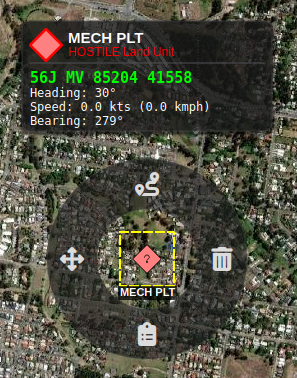
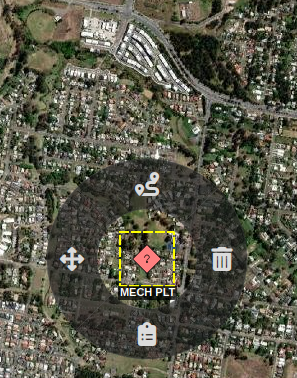
Symbols can have notes attached that display as tooltips:
With Note
Without Note
Connection States
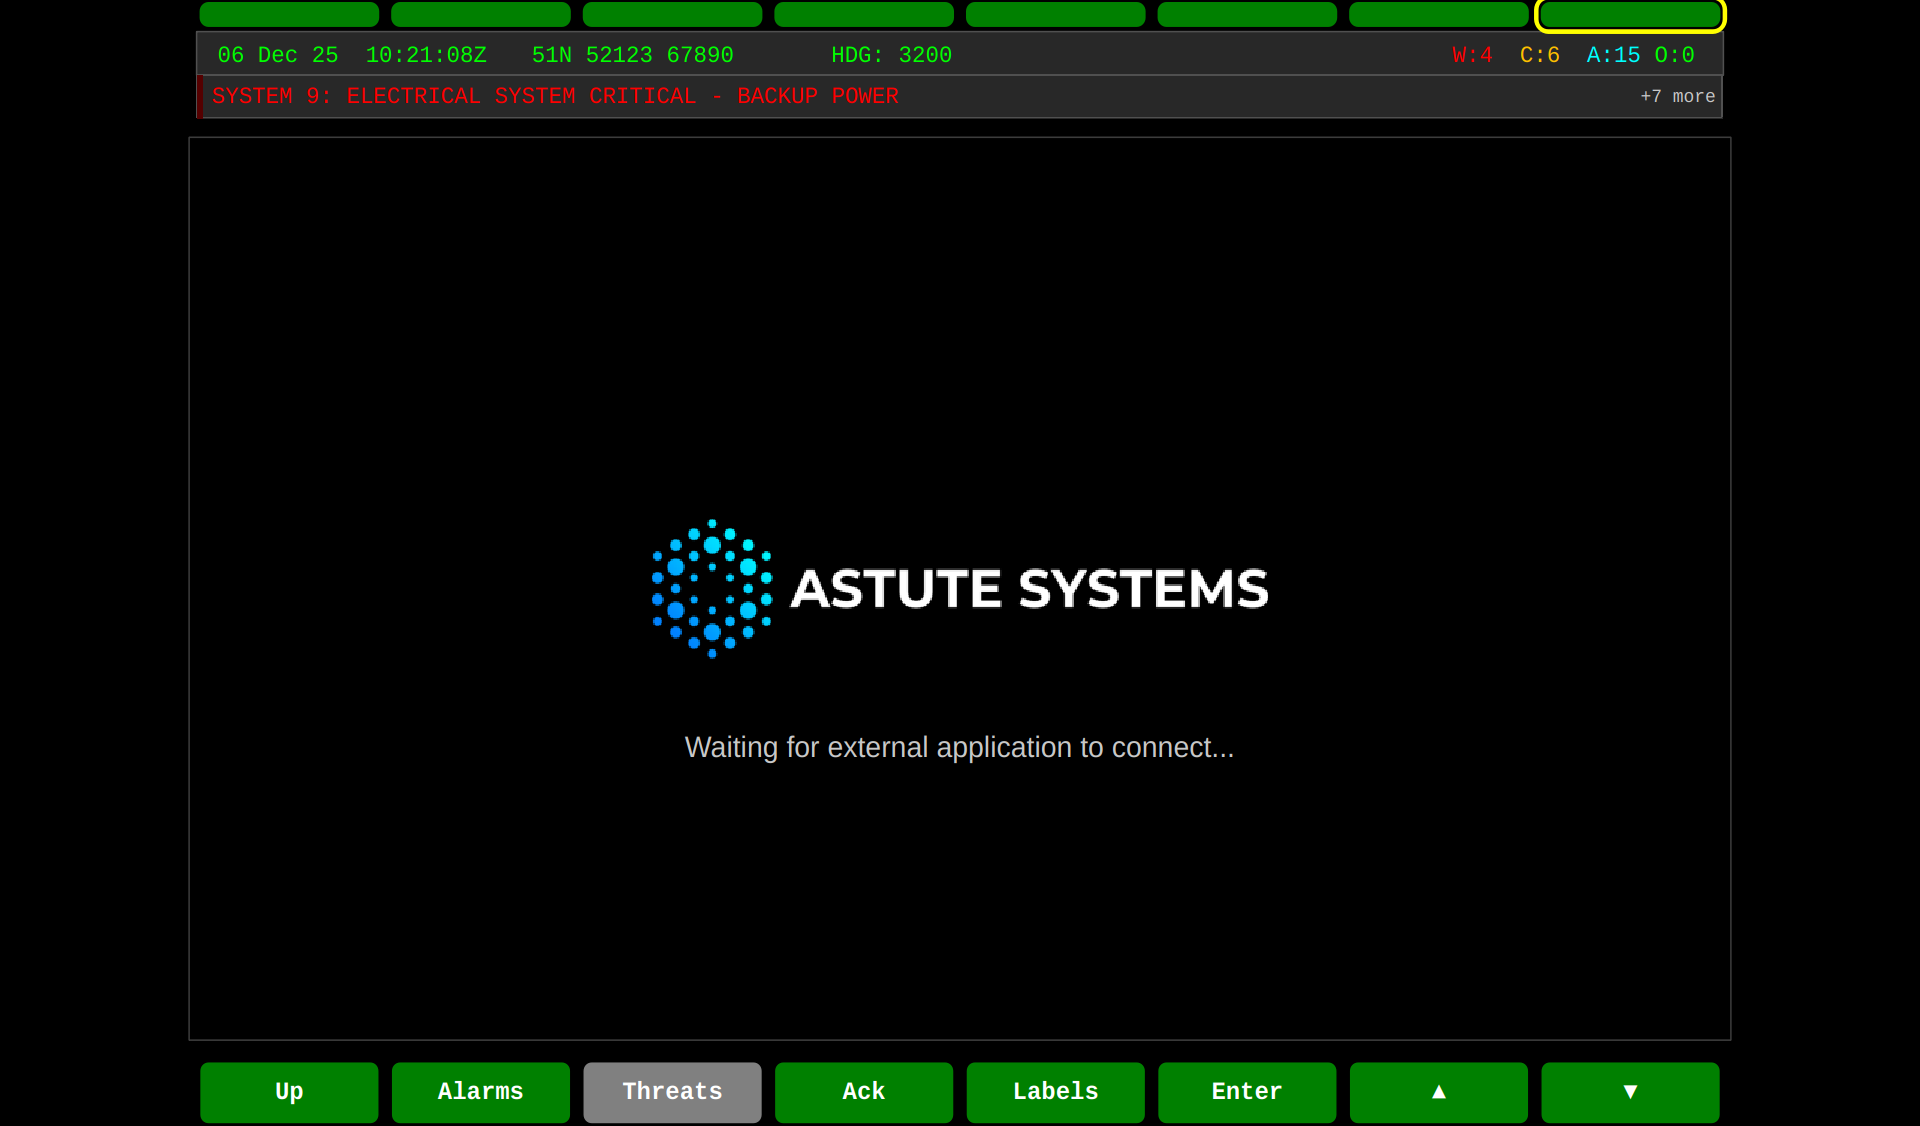
Waiting for External Application
When the HMI is waiting for the BMS application to connect:
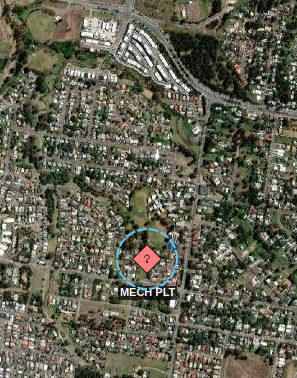
Dial Move Not Displayed
Radial menu in hidden state during map navigation:
Running the BMS
Prerequisites
- GVA HMI must be running
- Registry service must be running
- Network connectivity on DDS domain 0
Command Line Options
| Option | Description |
|---|---|
--standalone |
Enable standalone mode with floating toolbar and popup panels |
-s, --screen <screen> |
Target HMI screen: BMS (default), WPN, or STR |
-h, --help |
Display help information |
-v, --version |
Display version information |
Standalone Mode
Run the BMS in standalone mode for full tactical display:
HMI Integration Mode
Run the BMS as a third-party application for the GVA HMI:
The BMS will:
- Register with the Registry service to obtain a Resource ID
- Publish its Third Party Session to the HMI
- Configure bezel button labels (F1-F12) for map controls
- Display fullscreen and wait for HMI connection
With HMI Integration
For full integration with the GVA HMI:
# Start services
sudo systemctl start gva-registry.service
sudo systemctl start gva-alarms.service

# Start BMS
gva-app-bms &

# Start HMI
gva-hmi &
Accessing from HMI
- Start the HMI and BMS as shown above
- Press F28 (BMS) on the HMI function select bar
- The HMI control area will display "Waiting for external application..."
- Once connected, the BMS map view appears in the HMI
Standalone Toolbar
In standalone mode, a floating toolbar provides quick access to drawing and configuration tools:

| Icon | Tool | Description |
|---|---|---|
| 🖱️ | Pan/Select | Default mode - pan map and select symbols |
| 📍 | Point Dropper | Add military symbols to the map |
| 🗺️ | Map Layers | Configure map source and layer visibility |
| 🛣️ | Routes | Toggle route/track visibility |
| ⚙️ | Data Sources | Enable/disable live data connectors |
Status Bar
The status bar at the bottom of the screen displays real-time information:

- Cursor Position - Latitude/longitude and MGRS grid reference under cursor
- Map Scale - Current zoom level and approximate scale
- Data Source Status - Connection indicators for active connectors
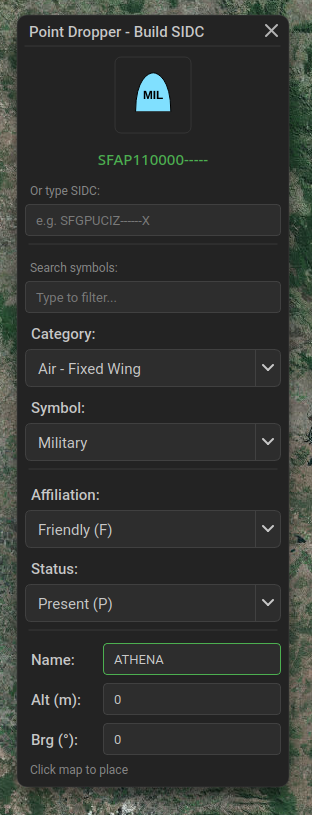
Point Dropper Panel
The point dropper allows adding military symbols with:
- Battle Dimension - Ground, Air, Sea Surface, Subsurface, Space
- Affiliation - Friendly, Hostile, Neutral, Unknown
- Symbol Type - Unit types specific to the selected dimension
- SIDC Input - Direct entry of 15-character Symbol Identification Code
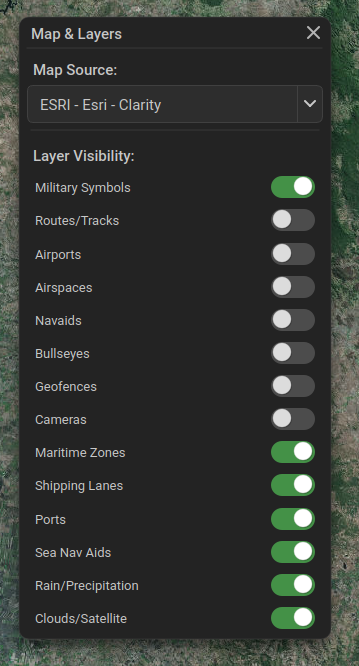
Map Layers Panel
Configure the map display:
- Map Source - Select from available tile providers (Satellite, Topo, Terrain, Street, etc.)
- Layer Toggles:
- Military Symbols
- Routes/Tracks
- Airports
- Airspaces
- Navaids
- Bullseyes
- Geofences
- Cameras
- Maritime Zones
- Shipping Lanes
- Ports
- Sea Nav Aids
- Rain/Precipitation (RainViewer radar)
- Clouds/Satellite (RainViewer infrared)
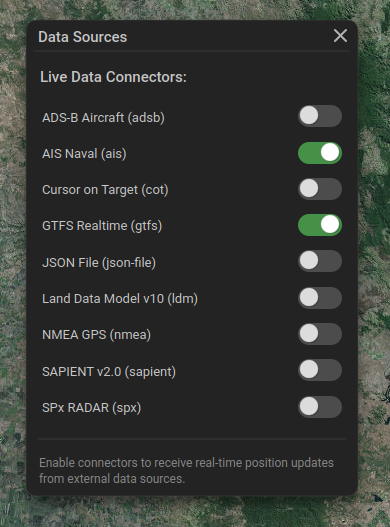
Data Sources Panel
Enable or disable live data connectors:
Live Data Connectors
The BMS supports multiple live data sources that can be enabled/disabled via the Data Sources panel:
AIS - Vessel Tracking
Automatic Identification System data from AISStream.io WebSocket API.
- Requirements: AISStream API key in
ais_config.json - Data: Vessel name, position, course, speed, type, flag
- Symbols: Rendered as MIL-STD-2525D sea surface symbols with affiliation based on flag
Configuration (ais_config.json):
ADS-B - Aircraft Tracking
Aircraft tracking from OpenSky Network REST API.
- Requirements: Optional OpenSky credentials in
adsb_config.jsonfor higher rate limits - Data: Callsign, position, altitude, velocity, heading
- Symbols: Rendered as MIL-STD-2525D air symbols
Configuration (adsb_config.json):
NMEA GPS
NMEA 0183 GPS data from serial port or network socket.
- Serial:
/dev/ttyUSB0at 4800/9600 baud - Network: TCP or UDP socket
- Data: Position, altitude, speed, heading
Cursor on Target (CoT)
TAK/ATAK compatible CoT message receiver.
- Protocols: SA (Situational Awareness), multicast UDP, TCP
- Data: CoT events with position, type, and metadata
GTFS Transit
General Transit Feed Specification for public transport.
- Data: Bus, train, tram, ferry positions and routes
- Sources: Configurable GTFS-realtime feeds
JSON File
Load symbols from static JSON files.
- Format: Array of symbol objects with SIDC, position, and metadata
Controls
Bezel Buttons (F1-F12)
The BMS configures the side bezel buttons for map navigation:
| Button | Label | Function |
|---|---|---|
| F1 | Zoom+ | Zoom in on map |
| F2 | Zoom- | Zoom out |
| F3 | Pan ↑ | Pan map north |
| F4 | Pan ↓ | Pan map south |
| F5 | Pan ← | Pan map west |
| F6 | Pan → | Pan map east |
| F7 | Centre | Centre on default location |
| F8 | Sat | Switch to satellite imagery |
| F9 | Topo | Switch to topographic map |
| F10 | Terrain | Switch to terrain view |
| F11 | Street | Switch to street map |
| F12 | Reset | Reset to default view |
Mouse/Touch Controls
When the BMS is active in the HMI:
- Click/Tap - Select symbol or place marker
- Drag - Pan the map
- Scroll wheel - Zoom in/out
- Long press on symbol - Open radial action menu
Map Rotation and Pseudo-3D Tilt (Standalone Mode)
In standalone mode, the floating map navigation overlay (compass/lock/tilt/zoom, top corner) and keyboard both support rotating the map and a pseudo-3D horizon tilt:
- Compass button - Reset the map to north-up and turn off track-up mode
- Tilt/3D button (mountain icon) - Toggle a fake/pseudo-3D horizon tilt on/off (a raster approximation only - no real elevation/terrain data is used)
- Two-finger twist (touchscreen) - Rotate the map continuously, alongside pinch-to-zoom
- Arrow keys (desktop) - Left/Right rotate the map, Up/Down adjust the tilt angle
Architecture
DDS Topics
The BMS uses the following DDS topics:
| Topic | Direction | Purpose |
|---|---|---|
Third_Party_Session |
Publish | Session registration |
Hard_Button_Label |
Publish | Button label configuration |
Hard_Button_Event |
Subscribe | Button press events |
Widget_Interaction_Event |
Subscribe | Mouse/touch events |
requestResourceId |
Publish | Resource ID request |
supplyResourceId |
Subscribe | Resource ID allocation |
setOperatingMode |
Publish | Operating mode changes |
Session Flow
Configuration
Map Tile Cache
Map tiles are cached locally in:
Default Location
The BMS defaults to Brisbane, Australia (-27.4698, 153.0251) at zoom level 10. This can be modified in the source code or via command-line arguments.
Military Symbols
Demo symbols are bundled into the application as a Qt resource
(:/data/demo_symbols.json). To use your own symbol set, point
"filePath" in bms_settings.json at your JSON file instead.
The JSON file defines MIL-STD-2525D symbols with positions:
{
    "description": "Demo military symbols for BMS application",
    "symbols": [
        {
            "id": "friendly-infantry-1",
            "sidc": "SFGPUCI----E***",
            "name": "1st Infantry",
            "latitude": -27.4698,
            "longitude": 153.0251,
            "note": "Main force element"
        }
    ]
}
For detailed information about military symbols including affiliation colours, symbol sets, and SIDC codes, see the Military Symbology page.
Troubleshooting
BMS Not Appearing in HMI
- Check Registry service is running
- Verify DDS domain ID matches (default: 0)
- Check BMS obtained a Resource ID in console output
- Ensure HMI is on BMS screen (F28)
Map Tiles Not Loading
- Check internet connectivity
- Verify tile cache directory is writable
- Try a different map layer (some may have rate limits)
Button Presses Not Working
- Ensure BMS is the active application
- Check HMI is forwarding button events
- Verify DDS connectivity between HMI and BMS
AIS Vessels Not Appearing
- Verify
ais_config.jsonexists in the executable directory - Check API key is valid (get from aisstream.io)
- Ensure AIS connector is enabled in Data Sources panel
- Check console for WebSocket connection status
ADS-B Aircraft Not Appearing
- Verify OpenSky Network is accessible
- Check
adsb_config.jsonfor authentication (optional but recommended) - Ensure ADS-B connector is enabled in Data Sources panel
- Note: Unauthenticated requests have strict rate limits
Weather Overlay Not Showing
- Enable Rain/Precipitation or Clouds/Satellite in Map Layers panel
- Weather data requires internet connectivity
- RainViewer API may have temporary outages
- Check zoom level - weather tiles only available at certain zoom levels
Popup Panels Not Responding to Clicks
- Drag the panel by its title bar only
- Ensure you're clicking on the toggle/dropdown, not the panel background
- Check if panel is fully visible within window bounds